TriPower
A six pack - Three 2s
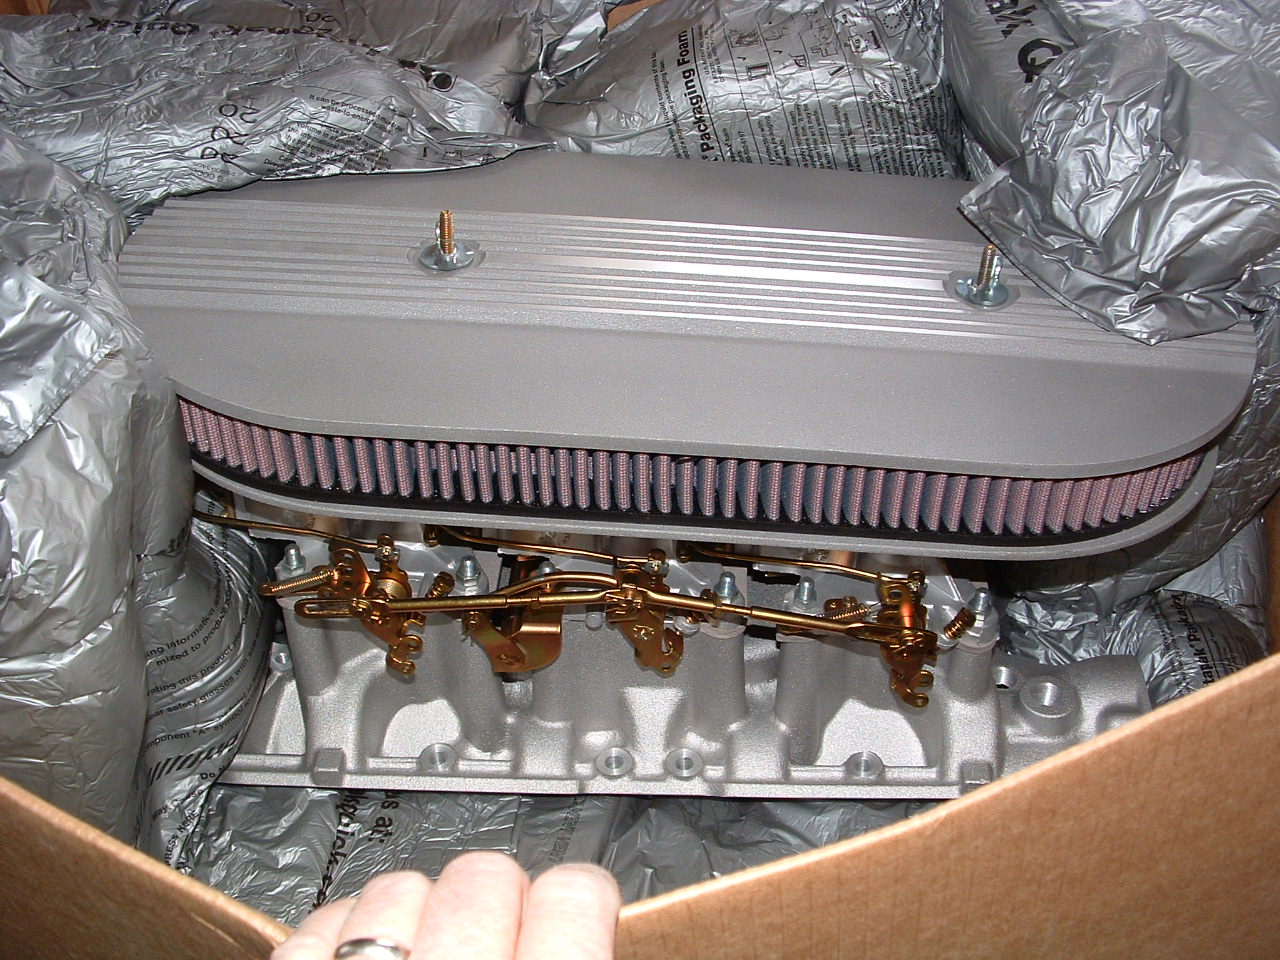
I have ordered and received a tripower setup from Pony Carburetors Inc. They were very nice on the phone and gave good service. It arrived in this box and included a video tape. The tape really concerns the care and feeding of Autolite 2100 carburetors. While very interesting there is very little about the tripower. Maybe 3 minutes at the end. I watched the whole thing and I would recommend doing this but it would be nice if they had a tape devoted to the tripower alone as I have discovered.
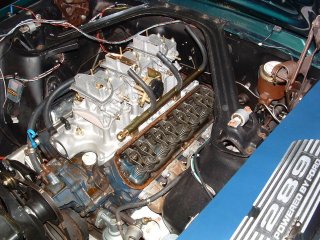
There are many things about this tripower that were not obvious to me. The first is that the carburetors are reversed. This means the throttle linkage is on the passenger side. It is crossed over with a shaft and lever to the driver's side. The choke coil is on the driver's side thus the heat tube must be custom built. The tape says Pony has special tubes. The longer the setup sat in the room with me the more I began to wonder if it would fit under the hood. I finally couldn't stand it any longer and I had to find out. Sigh!
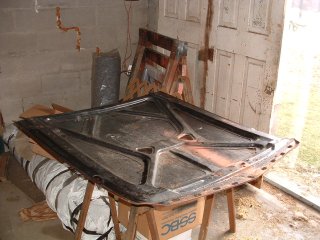
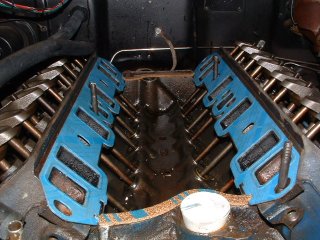
It is cold here in February but we have had some remarkably warm weather this year. I have been able to work in my unheated garage some. If the sun is shining I get some solar heat so it is almost above freezing. I have stripped off the 4 barrel and it's manifold. Wow, cast iron manifolds are heavy. I set the tripower on to check whether the hood would close or not. Disaster! The hood won't close and to boot I dented the hood. This was my fault. I had padded the air cleaner bolts but I pushed a little too hard. The hood is a reproduction (soft as lead) as the original was showing the effects of 40 years of neglect and misuse (see below). If you lay a straight edge across the tops of the fenders the clearance above the highest point on the carburetor is a skinny inch. I think that the original hood might fit with some modifications to the air cleaner. Without the air cleaner it does fit but operation without an air cleaner is not an option for me. Overall I believe that I need about three quarters of an inch more clearance. The spots on the underside of the hood in the picture below are lumps of clay. They indicate where the air cleaner top hits under the hood. ( If you right click the pictures and then click view image. You will get a larger view.)

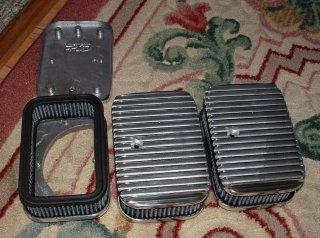
The first thing I'm going to do is clean up the old hood and see if it helps the problem. Some measurements indicate I might gain about a half an inch from the arc in the hood. I think I can gain about an eighth of an inch by modifying the air cleaner mounting plate. I may also reshape the top cover plate at the ends the gain a little clearance. If the hood brace is the main problem it is always possible to modify it. The best way to fix this would be a thinner air cleaner element but I don't think that is possible. I wonder if the individual air cleaners for each carburetor would be better. I have a call in to Pony Carburetors asking about getting the hood to close. I hope they have some useful suggestions. Talked to Pony Carburetors yesterday (2/27/06) and it seems that once in a great while there is a fitment problem with a tripower. If I had been smart enough to buy the three individual air cleaners when I ordered I suspect that I might have avoided most of this problem. The individual air cleaners do not make as long a unit and thus miss the hood brace giving nearly and inch more clearance. I will still have to watch the hold-downs! I made a cardboard model of one of the air cleaners. I could deduce the size of the individual ones from the spacing of the carburetors. Of course I'm still not really sure of the thickness. I will ask about this. I learned that the singles are 2 3/4 inches tall I know from checking with my model that at least three inches will fit if it avoids the hood brace. Time to call and order. Done and the old large oval one is on its way back. NOW WE WILL SEE!
I suspect every time you start modifying a car you will run into problems of fit. Except for my stupid blunder this is something you just have to deal with.
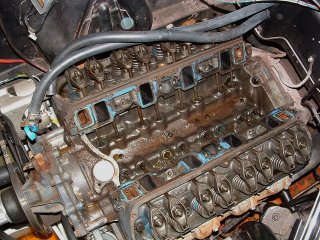
Yesterday I decided to check the fit of the fuel log and my new valve covers. Valve covers were not a problem but the fuel log mounting tabs appear to be too long they hit the edge of the heads before tightening down flat. With a bit of study it appeared to me that when the foot was bent it was not bent on the “mark”. I decided that I needed to re-bend things. My 2 and one half pound sledge and I had our way with the mounting tabs. I'm glad the steel in the tabs was not very hard. It all looks good now.

I am now waiting for the individual air cleaners and a choke heat tube for this setup. I'm also making some progress on the old hood. I sure like the new valve covers.
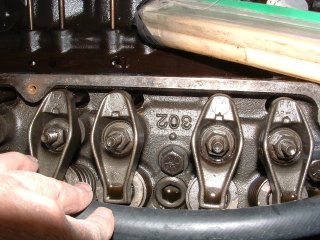
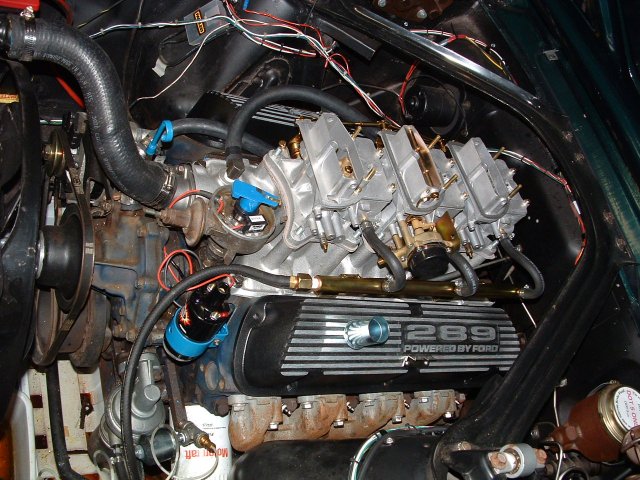
A discovery has been made. Either this is a 302 engine or a 289 with 302 heads. Sigh, I always wondered if this was the original engine. I am now nearly sure it is not. Unfortunately I need to remove the starter to see the casting number on the block. This may not help as I found out that in 1968 Ford made 289s using 302 blocks and 302s with 289 blocks. I always liked the 289 engine but is it worth a complete rebuild just to have one? What am I going to do with my 289 valve covers? Use 'em!
I have begun permanent installation of the tripower. I have installed the manifold, distributor,and coil. I used a material called Gasgacinch. I found a news group message that described it as “elephant snot” which isn't too far off it's appearance. (Actually I've never seen elephant snot but it seems right). The stuff is painted on all surfaces then wait at least 5 minutes. Several hours still works so you have plenty of time to assemble things. It appears to work quite well. I used three studs left over from disassembly to act a locating pins for the manifold since moving it after touchdown is more than difficult. I also had my wife guide the bypass hose on to the waterpump as I set the manifold down. She is so cool about helping. Note these gaskets have been coated with Gasgacinch. I found this stuff on Edelbrock's website. I didn't buy it there as the shipping was more than twice the price. Motorcycle shops should have it. I used black silicone sealer on the joints as recommended.
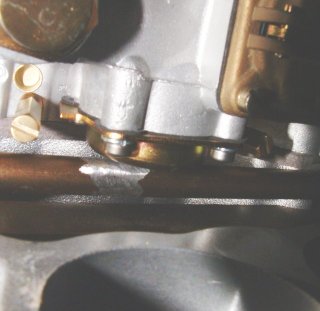
I had a little fun putting the distributor back into the engine. If you look at the left hand picture above you will notice that the carburetor to manifold seal sticks out. The distributor hit this seal. I discovered that with a little patience a tile (hook) knife could be used to trim this out of the way (see second pic).
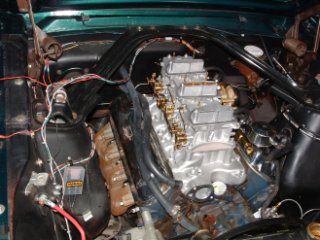
I got the fuel lines hooked up today (04/04/06). In the process I discovered that I could barely move the throttles. With a little inspection I found that the cross-over rod that brings the throttle control to the driver's side was rubbing hard on something. I could not see what. I had to remove the rear carburetor. This can only be done by removing the nuts and the studs and you must remove rear nuts and studs and loosen the front nuts of the middle carburetor. Now you can finesse the cross-over out. Mine showed rub marks which I finally figured out it was rubbing on the bottom of the middle carburetor power valve. I first tried to relieve this by grinding some relief but I decided it would take too much. I just bent the mounting bracket so there was clearance. I also had to modify (shorten) my throttle rod. All seems to work now. It is going to take a strong leg to open the extra carburetors.
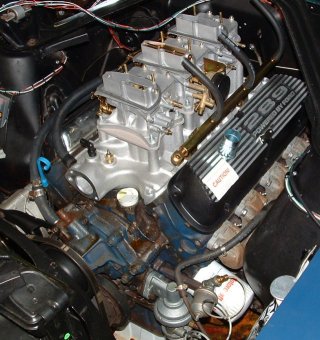
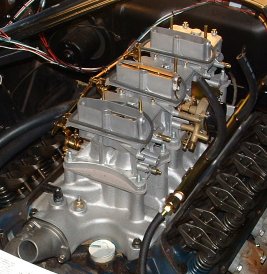
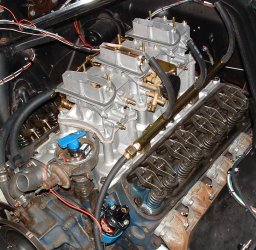
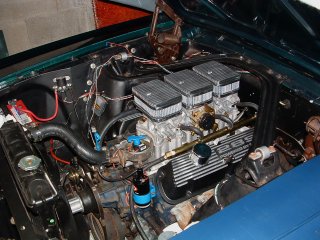
The second picture shows where we are going but is mostly a mock-up. I did receive a call today that the individual air cleaners have been shipped this morning.
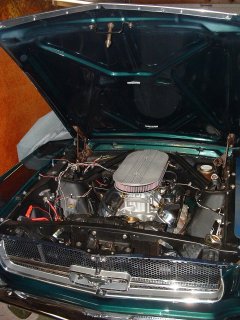
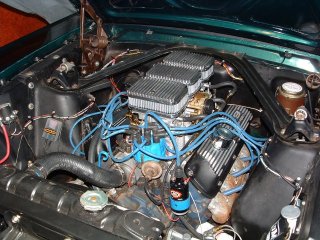
They arrived today (04/06/06). They are very nice. I have some pictures below. At first they would not quite fit but after filing a bump which protruded into the D shaped hole all went together. The big news is that the hood closes without interference. There appears to be about 3/4” clearance at the front and they are well behind the hood brace.
I think it really looks cool.
It is now (4/8/06) functional. It started and ran after I pumped about a half a cup of gasoline simultaneously into old water bottles at the end of each inlet tube for the carburetors. I discovered a few leaks but was able to stop them by tightening various connections. My only concern is the idle speed. At first it was very high around 2200 rpm.. Yes, I made sure the choke was off. I can not get it to idle below about 1400 rpm. This might not bother most people but I like a slow idle maybe 600-800 rpm. I'll think on it.
I drove it to Mercer to get some gas (2.79/gal middle grade). It ran very smooth but I still have my overall vibration that starts about 45 and really rumbles at 55. The frequency seems too high for tires so I think it is either driveshaft, input, or output shaft of the transmission. It is an annoying rum-rum on top of a somewhat noisy exhaust. Anyway all hesitation and twitchyness seems to be gone. Engine appears smooth at a steady speed and takes the throttle with nothing but go! Love the sound when the other two carburetors cut in. It seems to have plenty of power even on just the two barrel. What do I know? I normally drive a Focus. :)

Return to Mustang Page 2